Articolo
Articolo
SHOW & TELL - Dip Dye Technique For Varily's Unique 3D Printed Jewelry
SHOW & TELL - Dip Dye Technique For Varily's Unique 3D Printed Jewelry
One of Varily Jewelry’s most exciting features is that every piece is uniquely coloured by hand, through a dip dye process. This hands-on step of our production ensures that every piece is a one-off.
Dive into our technique and have a pip into our lab to find out how we achieve the vibrant colours of Varily’s pieces. In this post we will guide you through every step of the colouring stage.

STEP 1 - PREPARATION
After printing, the pieces come out of the laser machine rough and white. They need prepping before they are ready to absorb the colourful dyes. They are filed, smoothed and treated to maximise the colour’s radiance and refine the surface from the natural imperfections caused by the printer.

STEP 2 - THE PIGMENTS
It’s now time to mix the pigments. We follow our very own recipes, using non toxic, hypo-allergenic fabric dyes.

STEP 3 - THE BATH
The pieces are submerged in a bath of boiling solution, every colour has a different bathing time. The more colours a piece has, the more baths it has gone into.
At last, the pieces are soaked in a fixative bath, to get rid of the extra dyes and fix the colour.
STEP 4 - WATERPROOFING
After drying, every piece is coated with a waterproof sealant that also protects the colours from UV light. This sealant is safe for the skin, and prevents the pieces from staining your fingers or clothes.
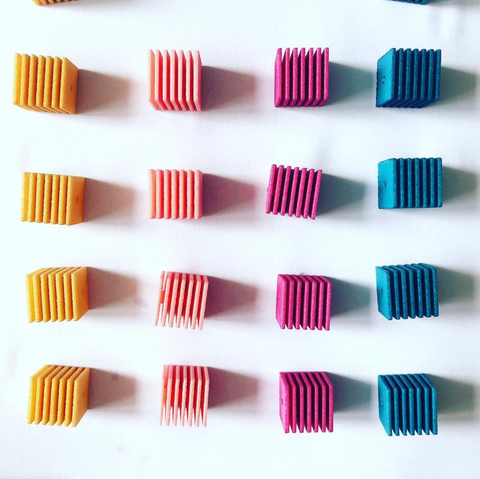
Colour is core at Varily. To achieve our beautiful and vibrant hues we experimented for years and mastered our very own dyeing process. The vibrant colours and gradients are achieved by hand dipping each and every piece in hypoallergenic pigments, then sealed and waterproofed, to a lovely smooth and matte finish.
We pride ourselves in making unique one-off jewelry that combines 3D printing with traditional hand-dyeing techniques.
Una delle caratteristiche più interessanti di Varily Jewelry è che ogni pezzo è colorato individualmente a mano, attraverso un processo di tintura ad immersione. Questo passaggio della nostra produzione garantisce che ogni gioiello sia un pezzo unico.
Sei curios@ di sapere come vengono ottenuti i nostri colori brillanti?
Dai un'occhiata nel nostro laboratorio per scoprire le tecniche ed i passaggi necessari. In questo post ti guideremo attraverso ogni fase della processo di colorazione.

STEP 1 - PREPARAZIONE
Dopo la stampa, i pezzi escono dal laser ruvidi e bianchi. Hanno bisogno di essere preparati prima che siano pronti ad assorbire le tinte coloranti. Vengono limati, levigati e trattati per massimizzare la brillantezza del colore e rifinire la superficie dalle naturali imperfezioni causate dalla stampante.
STEP 2 - I PIGMENTI
Ora è il momento di mescolare i pigmenti. Seguiamo le nostre ricette, utilizzando coloranti per tessuti atossici e ipoallergenici.
STEP 3 - IL BAGNO
I pezzi vengono immersi in un bagno di soluzione bollente, ogni colore ha un tempo di immersione differente. Più colori ha un pezzo e piu' sono i bagni necessari per ottenerli.
Infine, i pezzi vengono immersi in un fissativo, per eliminare i pigmenti in eccesso e fissare il colore.
STEP 4 - IMPERMEABILIZZAZIONE
Dopo l'asciugatura, ogni pezzo viene rivestito con un sigillante impermeabile che protegge i colori anche dai raggi UV. Questo sigillante è sicuro per la pelle e impedisce ai pezzi di macchiare le tue dita o i vestiti.
Il colore è il cuore di Varily. Per ottenere le nostre tonalità vibranti abbiamo sperimentato per anni e padroneggiato il nostro processo di colorazione. I colori vivaci e le sfumature sono ottenute immergendo a mano ogni singolo pezzo in pigmenti ipoallergenici, quindi sigillato e impermeabilizzato, con una bella finitura matte e opaca.
Siamo orgogliosi di realizzare pezzi unici che combinano la stampa 3D con le tradizionali tecniche di tintura artigianale.
Thanks. I Lerner a lot.